
QR Code Error Correction Levels Explained
This is the reason a QR code with your logo in the center still scans perfectly — and why some codes tolerate damage far better than others.
The problem error correction solves
A QR code stores its data as a precise pattern of black and white squares. Real-world printing and scanning is imperfect — ink smudges, packaging gets creased, phone cameras catch glare, labels get scuffed in shipping. Without some built-in redundancy, any of that would make a code permanently unreadable. Error correction is the mathematical technique (based on Reed-Solomon codes, the same family used in CDs and DVDs) that lets a QR code reconstruct its data even when part of the pattern is missing or misread.
The four levels: L, M, Q, H
QR codes support four standardized error-correction levels, each trading a bit more redundancy for a slightly denser, more complex-looking code: Level L (Low) can recover from about 7% damage or obstruction, Level M (Medium) about 15%, Level Q (Quartile) about 25%, and Level H (High) about 30%.
Higher levels store more redundant data alongside your actual content, which makes the resulting pattern slightly denser — for the same amount of encoded data, a Level H code has more visual complexity than the same content at Level L.
Why a logo always pushes you toward Level H
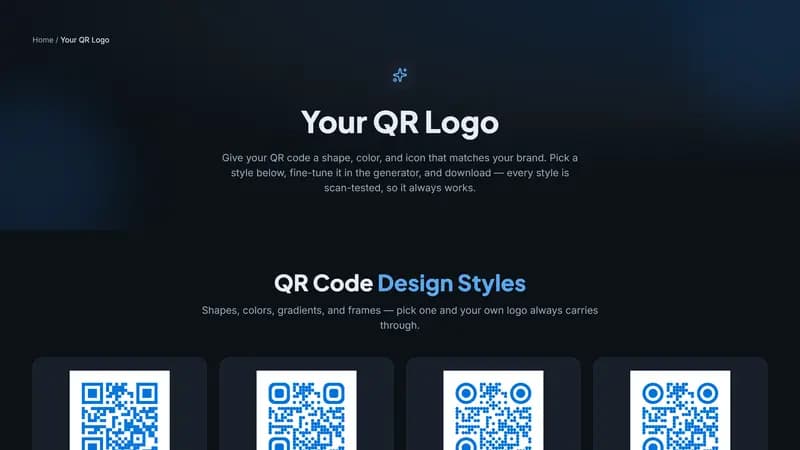
Placing a logo in the center of a QR code physically covers part of the underlying pattern — without high error correction, that missing chunk of data would make the code unreadable. At Level H's roughly 30% damage tolerance, a reasonably sized center logo (generally kept under about 30% of the code's total area) sits comfortably within what the code can reconstruct, which is why any generator that supports logo embedding should automatically switch to Level H when a logo is added.
Do you need Level H even without a logo?
Not necessarily — for a clean digital QR code with no logo and no expected physical damage (a code displayed only on a screen, for instance), Level L or M is perfectly reliable and keeps the pattern as simple as possible. Reach for Level Q or H specifically when the code will be printed somewhere it might get dirty, scratched, exposed to weather, or otherwise physically compromised — outdoor signage, product packaging that travels through shipping, or anything printed at a small size where minor print imperfections are more likely to obscure a meaningful share of the pattern.
Does higher error correction affect scan speed?
In practice, no — modern smartphone cameras decode any of the four levels essentially instantly. The tradeoff is entirely about the resulting code's visual density, not scanning performance; the extra redundancy data only matters if part of the code actually needs reconstructing.
Does error correction make a code harder to design around?
Slightly — a higher error-correction level does result in a marginally denser-looking pattern for the same content, since more of the grid is dedicated to redundancy data. This is rarely noticeable to the eye and never affects whether the code scans; it's a purely cosmetic tradeoff in exchange for real damage and obstruction tolerance.
What this means in practice
If you're adding a logo, error correction should be handled automatically — a generator worth using switches to Level H whenever a logo is present, without you needing to configure it manually. If you're printing anywhere the code might get dirty, scratched, or weathered, choose a generator (or setting) that defaults to Level Q or H rather than the lowest setting, purely as insurance against real-world wear.
The math behind Reed-Solomon error correction, in plain terms
Reed-Solomon codes work by encoding your actual data alongside extra, mathematically-derived redundant data — think of it as a checksum sophisticated enough not just to detect an error but to actually reconstruct the missing or corrupted original information. When a scanner reads a damaged code, it uses this redundant data to solve for what the missing or misread portions must have originally been, similar in spirit to how you might reconstruct a word from a few missing letters if you know the surrounding context and the rules of spelling — except done with mathematical certainty rather than guesswork.
This is also exactly why higher error-correction levels store more redundant data: Level H dedicates more of the code's total capacity to this reconstruction data than Level L does, which is the direct cause of the denser-looking pattern at higher correction levels for the same underlying content.
How error correction level affects the maximum data you can encode
For a fixed physical size of QR code, choosing a higher error-correction level reduces the maximum amount of actual data you can encode, since more of the available space is used for redundancy rather than your content. This rarely matters for typical use cases (a URL or a vCard easily fits even at Level H), but it becomes a real consideration if you're encoding a large amount of text or data and also want maximum error correction — in which case you may need a physically larger code to fit both comfortably.
Testing your own error-correction assumptions
If you want to see error correction in action rather than just take it on faith, print a code at Level H, then deliberately cover a modest corner or edge portion with a sticker or marker and try scanning it — a properly generated Level H code should still scan successfully with a reasonable amount of obstruction. This is a genuinely useful sanity check before a large print run for anything that will realistically get handled, weathered, or otherwise imperfectly maintained over its printed lifetime.
Common misconceptions about error correction
A common misunderstanding is that error correction makes a QR code somehow "more secure" — it doesn't; error correction is purely about damage and obstruction tolerance, with no relationship to encryption, privacy, or security of the encoded content. Another common misconception is that you need to manually recalculate or configure error correction for different print sizes — you don't; the error-correction level is independent of physical size and only relates to what percentage of the pattern can be reconstructed if damaged, regardless of how large or small the code is printed.
How this interacts with custom module shapes
Custom module shapes (rounded, dotted, or otherwise stylized data squares) can slightly reduce effective error tolerance compared to classic sharp squares, since the modified shapes carry marginally less unambiguous visual information per module. A well-built generator accounts for this by testing each supported style at every error-correction level to confirm reliable decoding before making it available, but it's a reasonable factor to weigh if you're combining a heavily stylized design with an already-demanding use case like a large logo on a small printed code.
A brief history of why QR codes have error correction at all
QR codes were originally developed for tracking automotive parts on a factory floor — an environment with grease, dust, scuffing, and imperfect lighting, nothing like the clean conditions of a retail checkout counter. Built-in error correction was a design requirement from the very beginning, not something added later, precisely because the format needed to survive genuinely rough industrial conditions from day one. That heritage is why QR codes remain so much more damage-tolerant than most other barcode formats even in their consumer marketing applications today.
Why generators don't usually expose this as a simple toggle
You might expect a generator to offer a plain "low/medium/high" toggle for error correction, and some do — but many instead handle it entirely automatically based on context (logo present or not), reasoning that most users don't need or want to make this decision manually, and that automatic, correct-by-default behavior produces better outcomes than exposing a setting most people wouldn't know how to evaluate anyway.
How other 2D barcode formats handle error correction differently
Other 2D formats like Data Matrix and Aztec Code use similar Reed-Solomon-based error correction concepts, but with different default tolerance levels and tuning suited to their own typical use cases — Data Matrix, for instance, is often configured for high tolerance by default given its common use in small, potentially damage-prone industrial part marking. The underlying mathematical approach across these formats is closely related, even though QR codes remain the most widely recognized example most people encounter day to day.
How to choose an error-correction level when you're not sure
When in doubt, default to Level M for general digital or lightly-printed use, and Level Q or H for anything printed and exposed to real-world handling, weather, or wear — including, always, anything with a logo. This isn't a decision that needs extensive deliberation for most everyday use cases; the practical downside of choosing a higher level than strictly necessary (a marginally denser-looking pattern) is minor, while the downside of choosing too low a level for a genuinely demanding environment (a code that fails once damaged) is a real, visible failure.
Error correction and code readability at a glance
It's worth clarifying one more time that a higher error-correction level does not make a code harder for a scanner to read under normal conditions — it only affects visual density and how much damage the code tolerates before decoding fails. A pristine, undamaged code scans identically fast and reliably at any error-correction level; the difference only ever shows up when something has gone wrong with the print or the physical code itself.
Why some competitors let you manually override this setting
A few generators expose manual error-correction level selection as an advanced option, useful for specific technical use cases (like maximizing data capacity for a large payload on a small code) where you're willing to accept lower damage tolerance in exchange for space. For the overwhelming majority of everyday use, automatic level selection tied to whether a logo is present remains the safer, simpler default — manual override is worth reaching for only if you have a specific, well-understood reason to deviate from it.
Putting the four levels in context one more time
Level L (about 7% damage tolerance) suits clean, screen-only, or short-lived digital codes. Level M (about 15%) is a reasonable general-purpose default for ordinary printed material with no logo. Level Q (about 25%) suits codes that will see moderate handling or environmental exposure. Level H (about 30%) is the right choice whenever a logo is present, or for anything printed somewhere genuinely rough — outdoor signage, product packaging headed through shipping, or small print sizes where minor imperfections matter more.
Why this detail is worth understanding even if you never configure it manually
Most people generating a QR code will never manually select an error-correction level, since a well-built generator handles this automatically based on whether a logo is present. Understanding the underlying mechanism still matters, though — it explains why a logo-embedded code sometimes looks visually denser than a plain one for the same content, why a heavily damaged or obstructed code might still scan when common intuition would suggest it shouldn't, and what's actually happening if a generator gives you an explicit choice between correction levels rather than handling it silently.
A final practical takeaway
If you take away only one thing from this guide, make it this: adding a logo to a QR code is safe and reliable as long as the generator automatically switches to Level H error correction — which any generator worth using should do without you needing to think about it. The math behind why this works (Reed-Solomon error correction reconstructing the data hidden behind your logo) is genuinely elegant, but you don't need to understand it deeply to trust that it works, provided you're using a tool that implements it correctly and tests its output before making a style available to generate.
Getting started
Add your logo in the generator above and error correction is handled automatically — no manual setting to configure, and every style is tested to confirm it still decodes reliably with a logo added.


Comments (0)
No comments yet — be the first.
Ready to create your Website URL QR code?
Free, no sign-up, and it works in your browser.
Website URL QR code generator